If you’re just getting started, product photography might feel overwhelming.
It certainly did for me years ago.
But if you learn the basic steps, the process is a breeze and allows you to make more money when selling stuff online in my experience.
Today, I take pictures to sell items on a regular basis, and will share everything you need to know to master product photography for ecommerce.
How important is photo quality for selling items?
When it comes to selling stuff, photo quality is more important than most people realize. It’s what makes your product listing stand out from thousands of other people selling the same thing.
According to Meero, 90% of online buyers claim that photo quality is the most important deciding factor to purchase.
If that wasn’t enough, better photos also allow you to charge more money for the same items, from my experience.
Here’s a story illustrating my point.
A while back, I picked up an old pair of Nike bowling shoes from the thrift store for $8. Turns out they were quite rare and were selling on eBay for $50-$110, according to sold listings.
I decided to put in extra effort taking the best pictures possible to see if I could sell them beyond the top price range at $170.
Nothing was special about my listing compared to the other ones except for the pictures – here’s how they turned out.
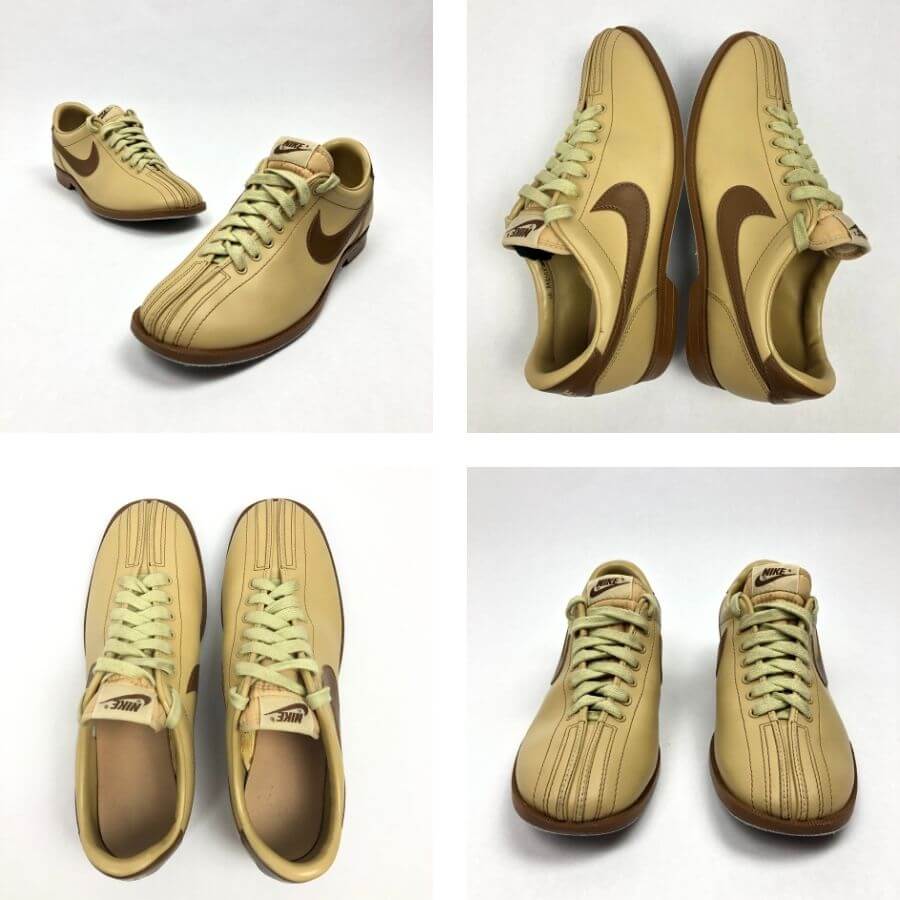
Several weeks later, I was shocked to hear the cash register sound on my phone indicating they sold for my target price.
Lastly, high quality product photos for ecommerce tell potential customers you are a professional seller that can be trusted.
If someone puts minimal effort into their product photos, buyers will expect the same effort level when it comes to packaging, shipping, and customer service.
These days there are also plenty of local selling options that don’t involve taking photos, such as selling to pawn shops or selling at flea markets.
What’s needed for amazing product photos?
When I started selling stuff online, people said you needed a DSLR camera, photo booth, expensive editing software… the list goes on.
Turns out you don’t need much to snap high quality photos, that’ll have sales pouring in.
You can always enhance your setup with fancier equipment over time, but when getting started all you need are a few basic elements.
- Camera – these days, phone cameras can take shockingly good photos (as long as your phone isn’t ancient). Phone quality photos will be more than enough for product photography.
- Clean background – Cluttered backgrounds distract shoppers from your product, and come across unprofessional. Always use a clean backdrop in your pictures like hardwood floors, brick, carpet, or neutral colored walls.
- Excellent lighting – Natural light works best, due to its balanced and warm nature. The next best option are Indoor lights, positioned so the product is fully visible for buyers.
Here are several examples of product photos I took on my living room floor when selling on eBay, with only an iPhone and ceiling lighting.
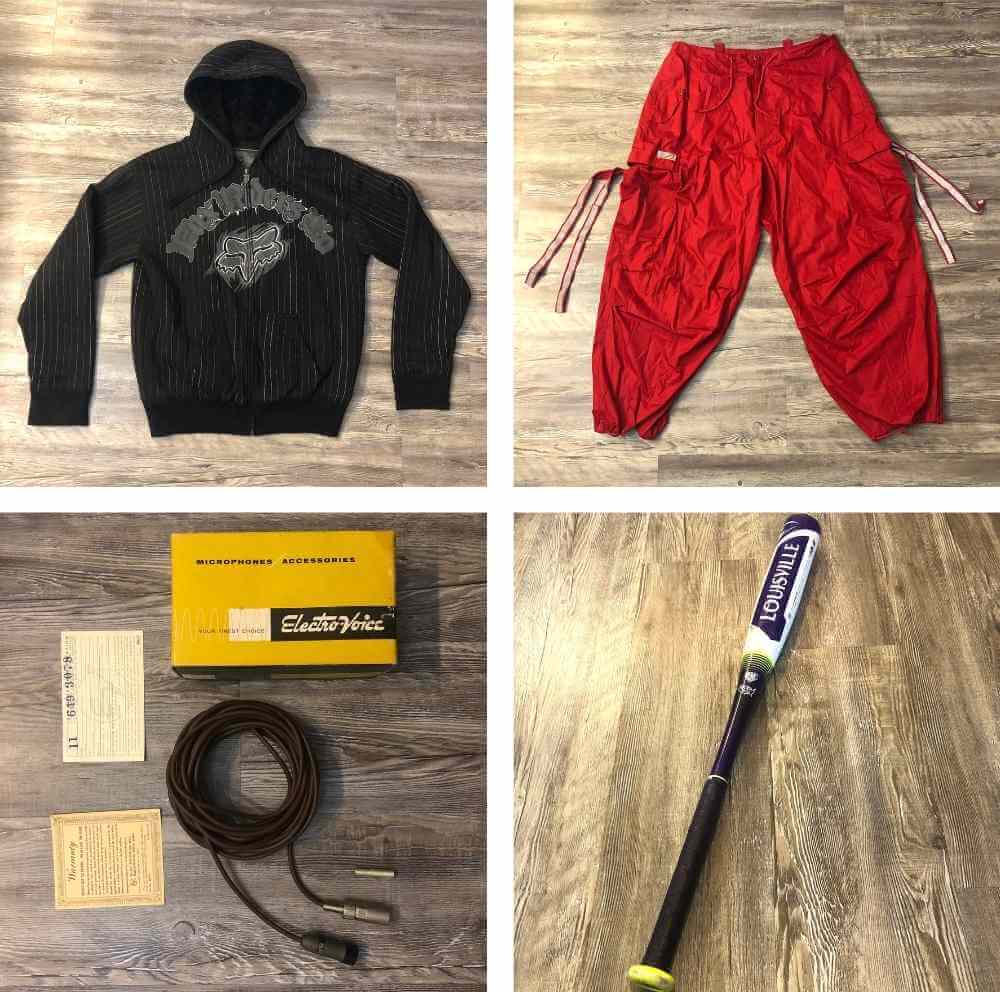
You can also make a huge difference in product photos by putting energy into smaller details like ensuring your product looks great (no dust, dirt or pet hair) and it’s displayed nicely. We’ll get into more tips below on this topic.
Best way to take pictures for selling items
Taking pictures for online selling can be broken down into 3 main steps.
If you follow these simple steps, you’ll be amazed how nicely your product photos turn out.
1. Find your Location
First and foremost we need to find a photography location that has three things: great natural or artificial light, a nice background, and can physically fit your product.
Here are several location ideas for your photos:
- Floor
- Dining Room table or kitchen counter
- Wall with nail to hang items
- Patio or driveway
- Table covered with white paper or polyester backdrop
I’ve tried all these ideas over the years, and prefer the table covered with a white backdrop.
Since the surface is lifted up, it’s more comfortable to move items between the surface for photos. I still use a hardwood floor for larger items or items that blend in too much with the backdrop.
Try out a few locations to see which one you like best. There’s no wrong location as long as there’s solid lighting and the background isn’t distracting.
2. Setup your Item
Take a few moments to make your items look presentable.
This means, brush off any dust or pet hair that may have gotten stuck on your product.
If applicable, wet a cloth with water to clean any smudges, dirt or scuffs that may be on your item.
Lastly, position your item in the most flattering way possible.
Here’s an example of an unflattering product position:
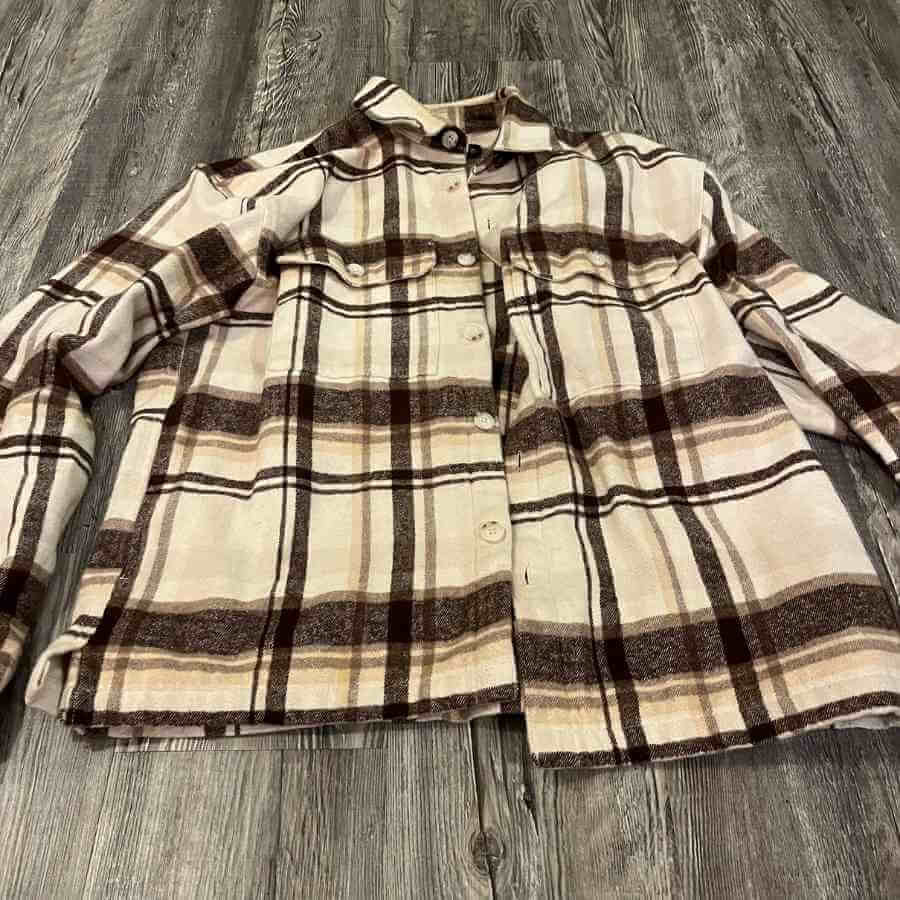
Now, here’s the same product in flattering position:
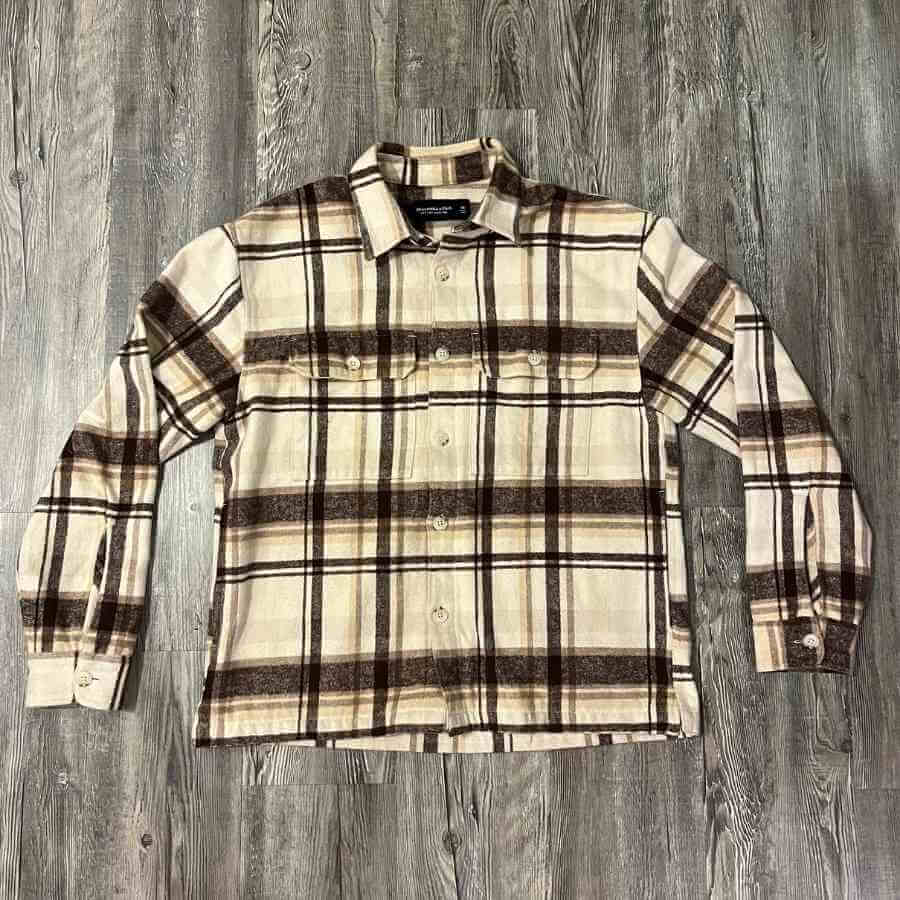
See the difference?
Many people skip this step thinking it won’t make a difference.
The truth is it can easily add 5-25% more earning potential to your listings, because they’ll appeal to a wider audience and look significantly more professional.
3. Snap Photos from Different Angles
Now that you have everything in the place, the time has come to take the pictures.
After you’ve taken a few pictures, rotate the item and get photos of all the sides. Lastly, get close up pictures of any tags, labels, or serial numbers.
Doing this ensures buyers can review all angles and details of what they are about to purchase.
Not only does this make buyers happy, but it also protects you as the seller because you have documented the product in its entirety.
So if a buyer comes back with a bogus claim about a condition issue, or the item wasn’t what you said it was, you can easily refute the claim since you photographed every view and detail of the item.
2 Secrets for Even Better Product Photos
After taking thousands of product photos myself, I learned several strategies to elevate product photos even more.
1. Paper towel trick
When shoes aren’t on your feet, they tend to compress a little bit. Normally we don’t notice this, because it’s a small detail. But when taking photos, it’s not the most flattering look.
One super cheap way to solve this issue is by crumpling up a paper towel and fitting it inside the shoe or boot, which simulates a foot being inside.
This creates a more realistic look for these photos, which will help these items sell for top dollar.
2. Incorporate measuring tape in photos
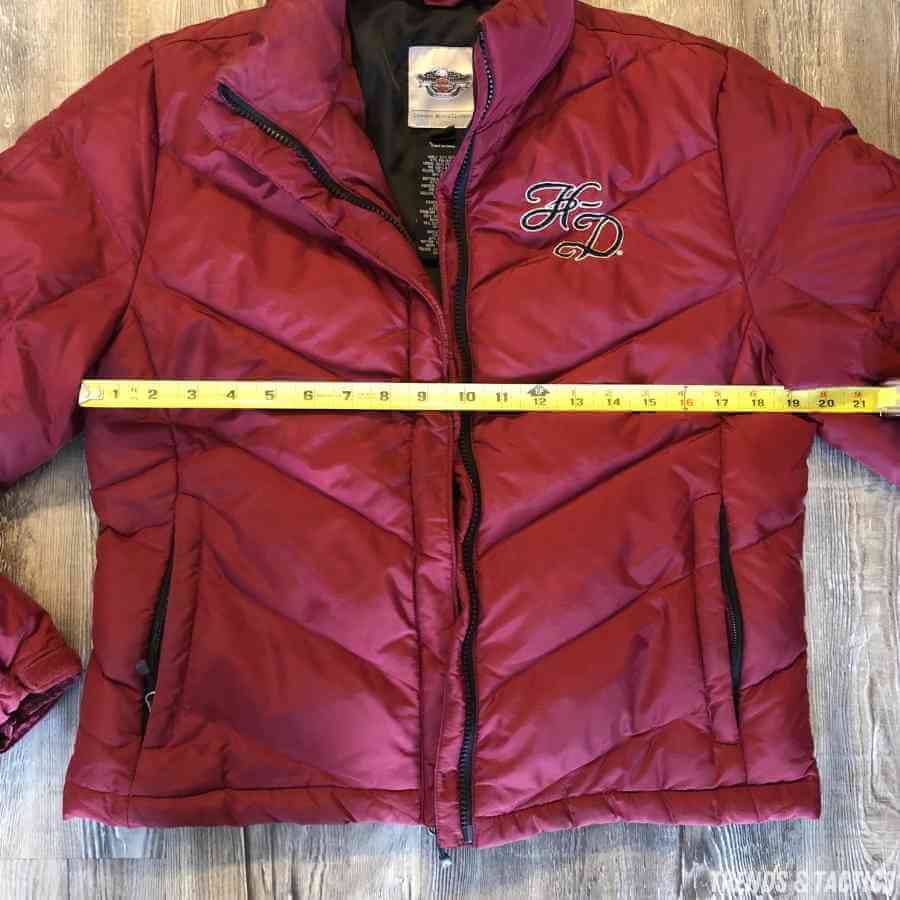
If you are taking pictures for eBay or any platform for that matter, communicating sizing with your customers is critical.
Most sellers put product dimensions in the listing description, but this relies on shoppers reading the description – which they don’t always do. This can result in higher return rates.
So, I always include several photos that have a measuring tape beside the item so shoppers can’t miss this information, plus it protects you if a buyer ever disputes product sizing.
John-Paul Cody has been an avid online seller for years, across platforms including eBay, Mercari, Craigslist, and more. He has a Bachelor's Degree in Economics from UNC Chapel Hill, and works in data analytics and marketing.
